Going from old to new while staying private.
We are on the eve of Aztec Connect’s mainnet release, and zk.money’s relaunch. Private DeFi is almost here!
But we can’t get there without our community. That means it’s migration season — time to withdraw funds from the old system and get it into the new one.
As previously discussed in our prior post outlining Aztec’s security approach, user aliases have been preserved, but due to the system hard-fork, funds must be manually migrated to the current version of zk.money.
Existing users can access the “old” system at — you guessed it — old.zk.money.
Start there.
Step 1: Log into “old” zk.money
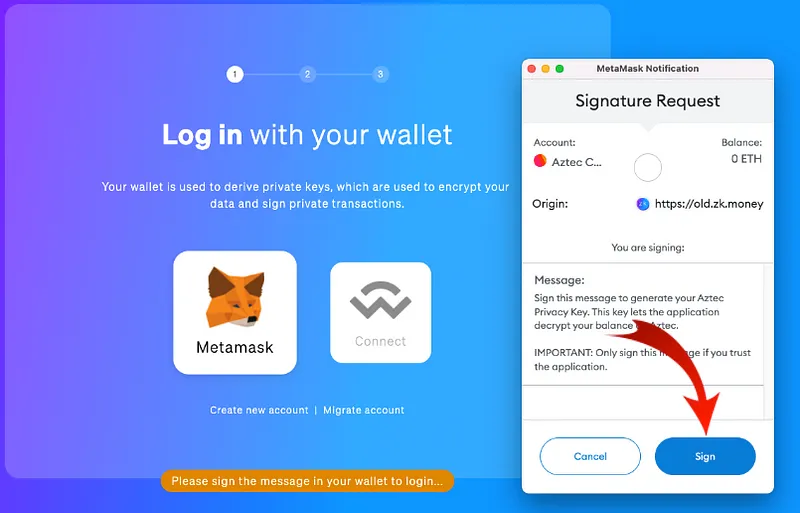
In order to migrate funds, navigate to old.zk.money and click “Login”:

Navigate to your MetaMask or WalletConnect supported wallet and use the Ethereum address that you originally used to register your alias with zk.money to log in.
⚠️ Important note on aliases: only the most recent alias associated with each unique Ethereum address has been migrated to the new system. ⚠️
If you misplaced your old.zk.money alias at any point and had to re-register with a new alias, those older aliases are lost.
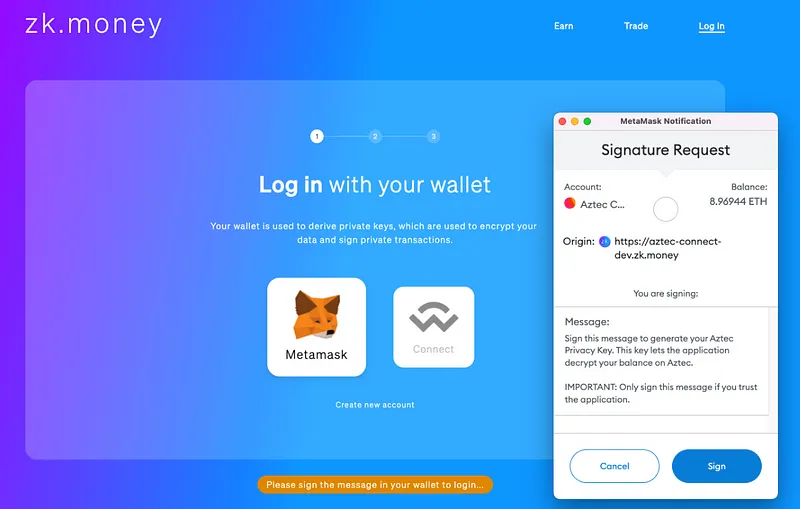
Sign the Signature Requests prompted by MetaMask.
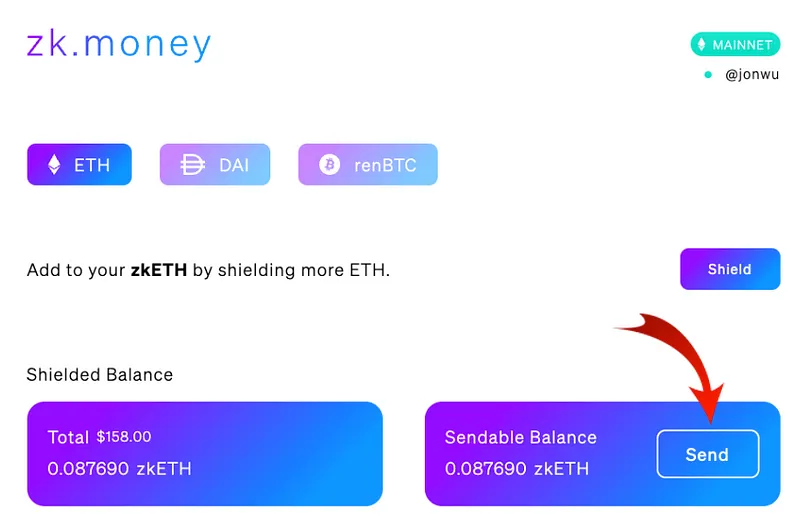
You will then be prompted with the familiar old.zk.money account balance page. Click “Send” to initiate a withdrawal to Layer 1.
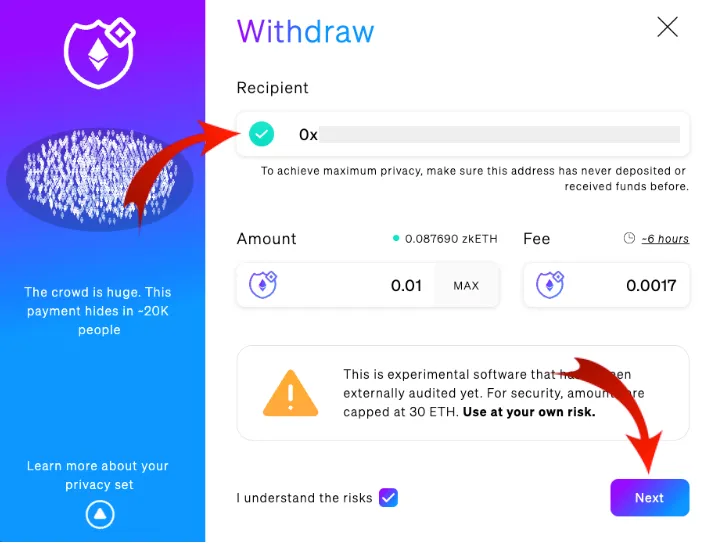
You will then be shown a Withdraw modal. Remember to follow privacy best-practices:
- Select a withdrawal amount not associated with your deposit — avoid unique quantities like 0.696969
- Withdraw to a fresh wallet that is NOT associated with your deposit wallet.
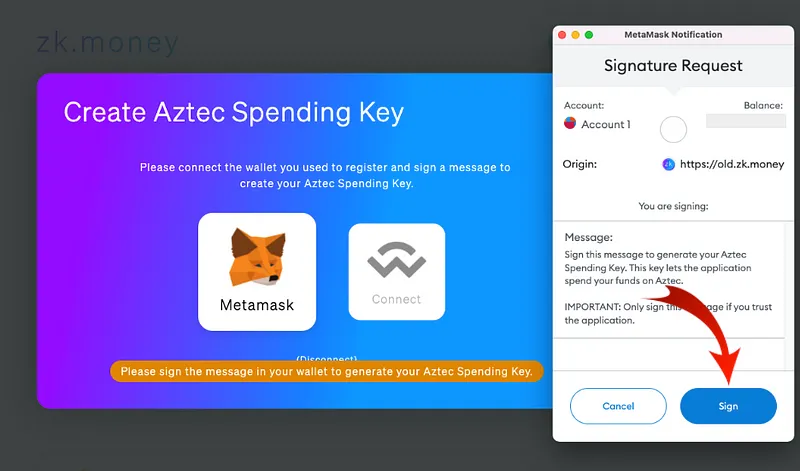
Sign the signature request when prompted by MetaMask.
You’re done! If the transaction isn’t showing up in the “Transactions” tab on Etherscan, please click on “Internal Txns.”

Step 2 (the fun part!): Access “New” zk.money
New zk.money can be accessed straight at zk.money! When you land on the homepage, click on “Shield Now” to be taken to the wallet connection screen.

At the sign up screen, click on “Log in” to be taken to the login screen.
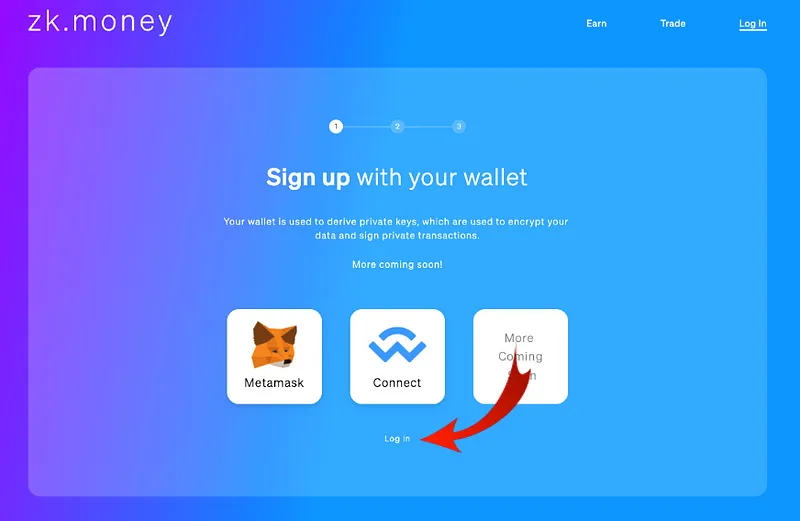
Here’s the key part: stay on or switch to the address you want to migrate from old.zk.money. Then, when prompted, enter your existing alias. Your alias has already been migrated and preserved!
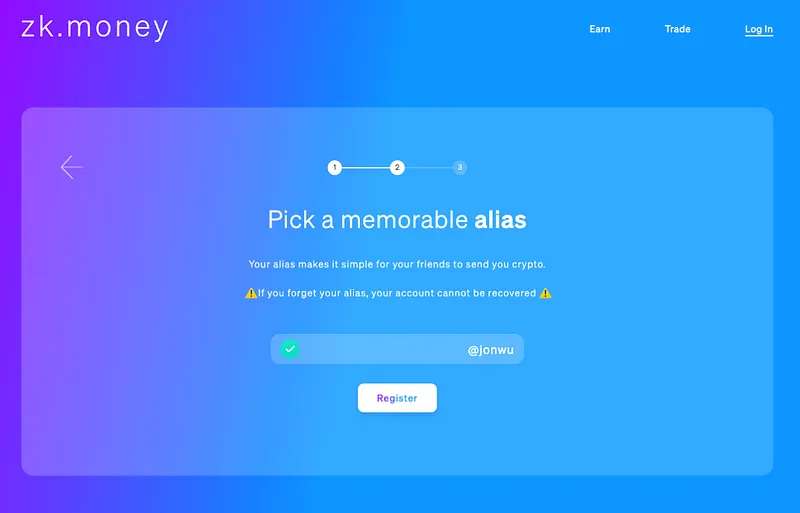
It’s important to note here that if you are registering a fresh address and want a new alias, you must now record your alias. Aliases can no longer be recovered, so if you forget your alias you will no longer have access to your account and funds.
⚠️ Important note on new aliases: pick a memorable alias and write it down! Losing your alias means losing account access. ⚠️
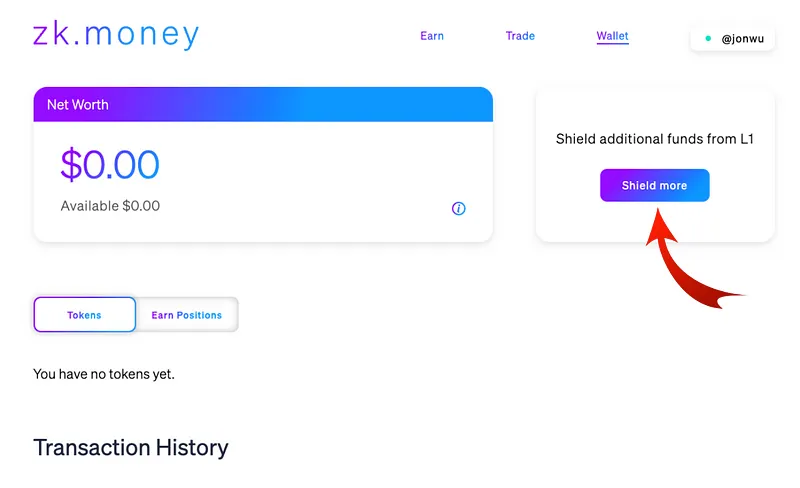
Once you’re at the zk.money Wallet screen, click “Shield more” to add funds to your balance.
It’s worth repeating deposit best practices:
- Do not deposit idiosyncratic amounts (e.g. 0.696969)
- Depositing many smaller quantities is better than depositing extremely large quantities
- Deposits are capped at launch to 5 ETH / 10,000 DAI
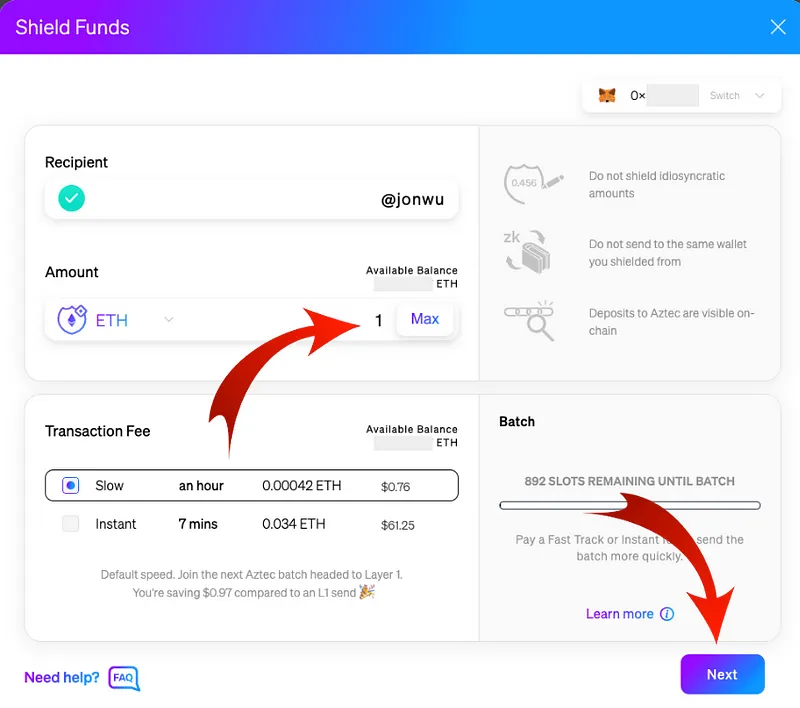
On this screen you can also select your transaction speed and fee quantity. “Slow” transactions ride along with many others, and settlement time average approximately an hour. “Instant” transactions involve paying for the entire rollup to go, prompting the rollup to settle to Ethereum as soon as the proof is constructed.
Once you’ve entered your amount and speed, click Next!
You’ll be taken to a Transaction Confirmation page which summarizes the amount to be shielded along with the Transaction Fee. Click “Confirm Transaction.”

You should see a Transaction Confirmed! Acknowledgement once the transaction goes through successfully.

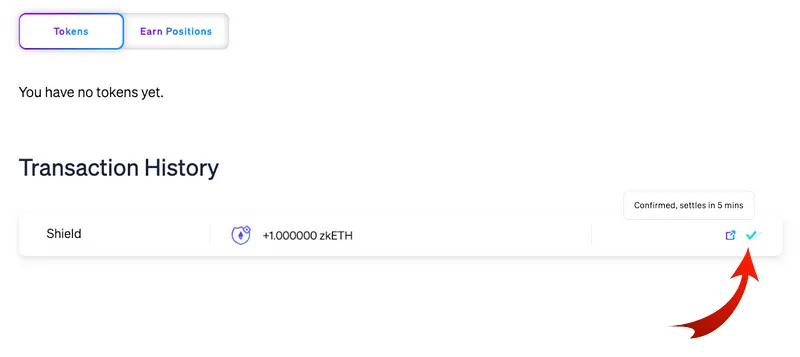
You will then be taken back to the Wallet screen, which will show a fresh “Shield” transaction under “Transaction History.” It should show one green check ✅ , which means the transaction has been sent to the Rollup Provider for settlement to Layer 1.
Hovering over the ✅ will also tell you approximately when the transaction will settle (updated in real time!).
Once you see ✅ ✅, the transaction is settled and your balance will show up in the “Net Worth” component up top on the Wallet page.
Note that “Net Worth” reflects the value of all your positions — liquid or illiquid — whereas “Available” funds reflects just your spendable balance.
These figures can therefore differ — don’t be alarmed.
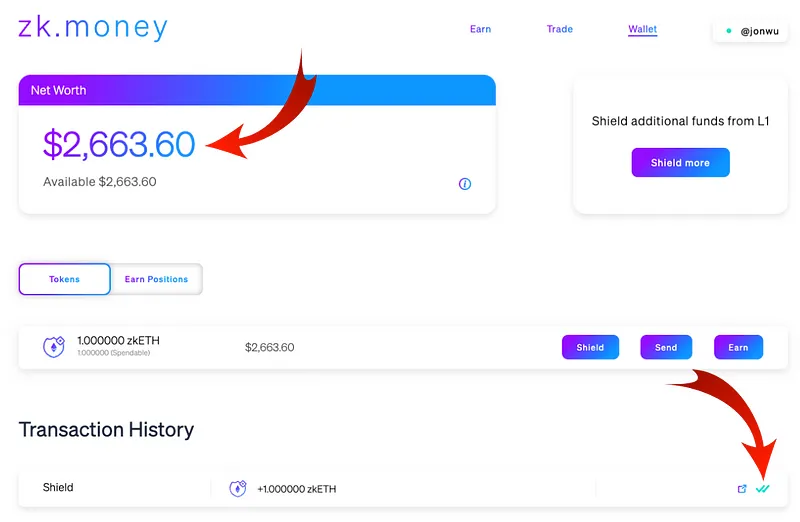
Once you get the double-green checks, you’ve got zk.money baby! Shielded funds can then be sent internally, forwarded to another Layer 1 address, or deposited with our launch partners Lido and Element for yield.
Many more use-cases are coming, so stay tuned, and stay private.
Build with Aztec Connect SDK
Are you a developer who wants to bring privacy to your favorite DeFi protocol? If you build it, we’ll fund it and direct users to the opportunity on zk.money.
- Aztec Grants Program: https://airtable.com/shrvglCZ24jaH73oe
- Connect Starter: https://github.com/AztecProtocol/aztec-connect-starter.
Help us make privacy a no-brainer.
Join the Aztec Community
We’re always on the lookout for talented engineers, business people, and applied cryptographers. If joining our mission to bring scalable privacy to Ethereum excites you — check out our open roles.
And continue the conversation with us on Discord or Twitter.

